


Flipkart Seller Registration Process Made Easy [STEP-BY-STEP Tutorial]
Flipkart is India’s biggest e-commerce platform headquartered in Bangalore. On Flipkart, sellers list their products from where buyers make their purchase through the online portal.
In order to sell their product online, sellers must register themselves on the Flipkart to get the seller’s account. There is a set of criteria from Flipkart, which must be fulfilled by the sellers in order to sell anything online.
We are going to discuss here how to register on Flipkart. But before that, we need to understand why it is so important for the sellers to register on Flipkart.
Table of Contents
Why Register as a Seller on Flipkart
Flipkart is one of the biggest e-commerce platforms in India and if you are selling online but not on Flipkart, then you are missing out on a big opportunity. [Know all about Flipkart]
But, in order to sell anything on Flipkart, sellers must get registered on the online portal. After registration sellers get their seller’s account login id and password.
Online registration for Flipkart’s sellers account is also important because it gives sellers recognition and authenticity. From Flipkart’s perspective, it is important to distinguish between sellers and buyers. Seller’s registration on the seller portal serves that purpose.
Flipkart Seller Registration – Requirements
To create a seller account on Flipkart, you have to go to seller.flipkart.com.
On the registration portal, the following credentials will be needed:
- Email id
- Phone no. for the OTP
- Full Name
- Password
- The agreement needs to be checked.
Documents required at the time of Registration:
- GSTIN.
- PAN Card Registration.
- Bank Account no. with KYC.
- Canceled cheque of the account used
- Address and Pickup address.
How to Register on Flipkart – Step-by-Step Process
After having a glimpse of Flipkart’s seller account requirements, let’s see the registration details through the following illustration.
Step 1 – Start the Registration Process
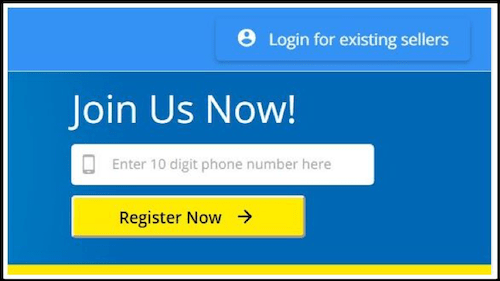
- Go to the link seller.flipkart.com on your browser.
- You will see a portal with login and registration options.
- Enter your mobile number and click on ‘Register now’
- An OTP will be sent to your mobile number and you will be redirected to the signup form.
Step 2 – Verify Mobile No., Email Id to Create Account
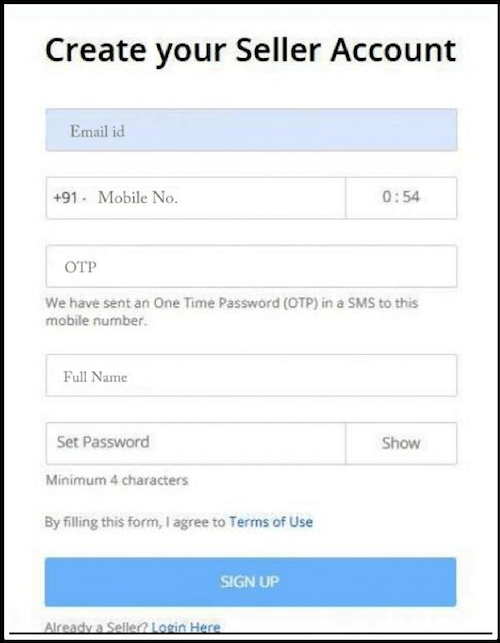
- In this form you have to submit your – Email Id, Mobile Number, OTP, and Full Name.
- OTP remains valid for 10 minutes.
- Choose a password that is at least 5 characters long and click on sign up.
- You will receive a verification link on your email. Click on the link to verify your account.
Step 3 – Give your Pickup and Address details
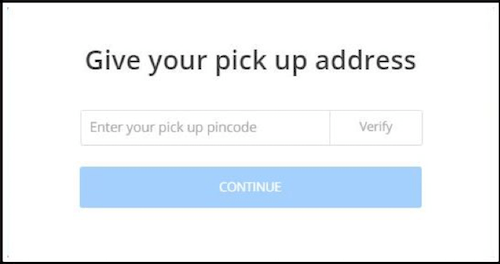
- Enter your pickup Pin Code and click on continue. This is the pin code of your warehouse or address where you are keeping your inventory.
- Flipkart will verify your pin code for the eligibility of pickup.
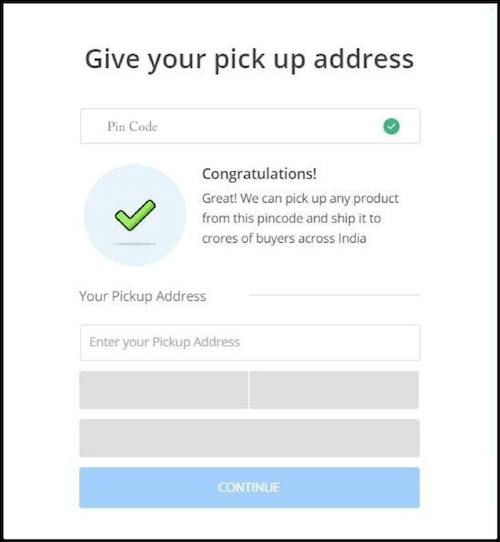
- Once your pin code is successfully verified, you will be asked to submit your business address.
- Enter your Pickup Adress and click on continue.
Step 4 – Give Your Business Details
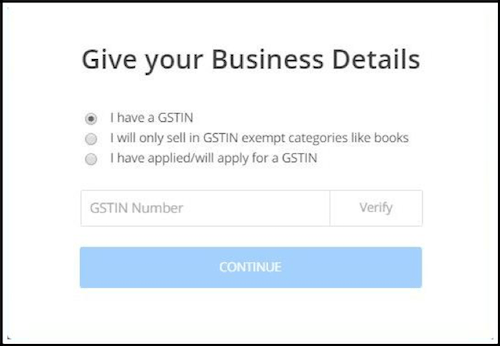
- If you have a GSTIN number, submit your GSTIN number and click on continue.
- If you don’t have GSTIN or your GSTIN application is in process, you can select “I have applied/will apply for a GSTIN” option and continue.
- If your category doesn’t require GSTIN, you can select “I will only sell in GSTIN exempt categories like books”
- After Submission, Flipkart will verify your GSTIN, if you have provided it.
Step 5: Submit Business Details
Submit the following Business Details:
- Business Name
- PAN Number
- Business type – Proprietor or Private Company.
- Business Address with Pin Code.
- Your scanned Address Proof via upload option
- Your scanned signature via upload option or digitally signed
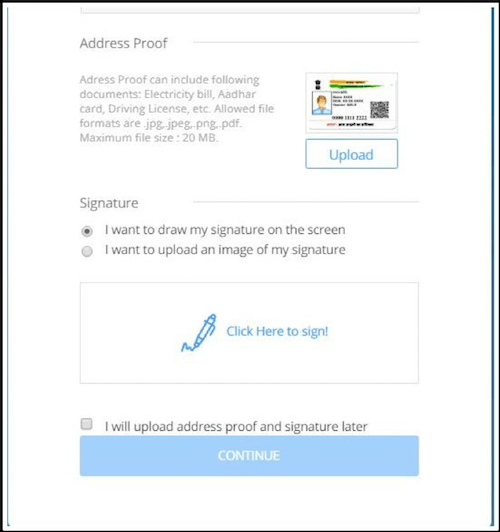
Note: You can skip uploading of address proof and signature by checking “I will upload address proof and signature later”. However, you still have to do it later before you can start selling.
After submitting all the details, click on continue.
Step 6 – Give your bank details.
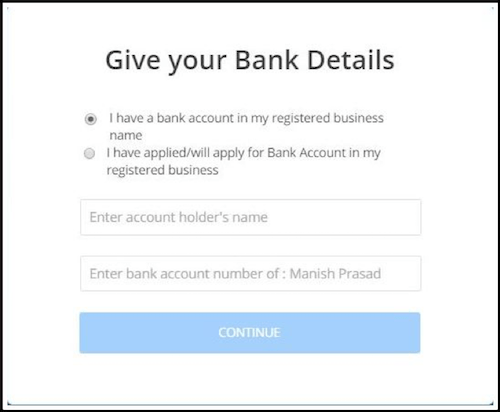
- Enter Account Holder’s Name. This should be exactly as your Name on the Bank Account.
- Submit your Account Number
- If you do not have a bank account yet or want to submit the information later, you can select “I have applied/will apply for Bank Account in my registered business”
- Click on Continue
Your Registration Process for Flipkart Seller Account is complete and you will be redirected to the Seller Dashboard.
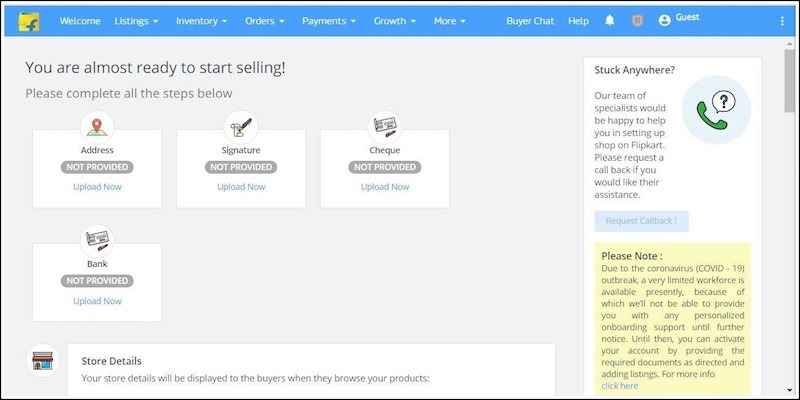
On the dashboard you can check all important details about everything which is required to sell a product on Flipkart.
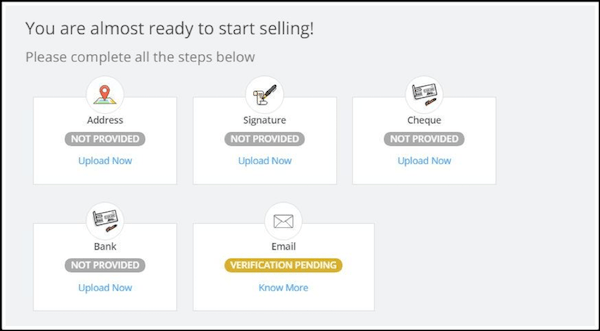
Complete Your Flipkart Seller Account Profile
In order to make your profile 100% verified and complete, you have to check the following details.
Details Status
You will see all the pending actions on your seller dashboard. The items will get dissolved, once you have submitted all the required details.
Update your Store Details
You will see a window with the option of updating the store details.
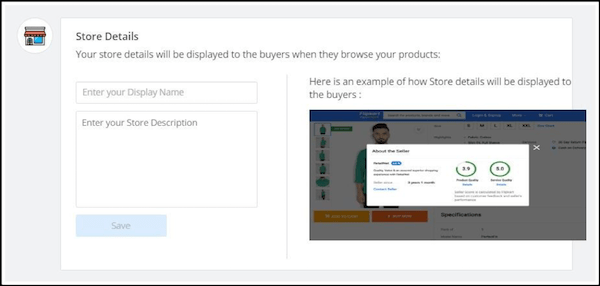
Submit your store Name, address, and other details in the form. On the right side, you can check where this description will be displayed.
Check your signature details
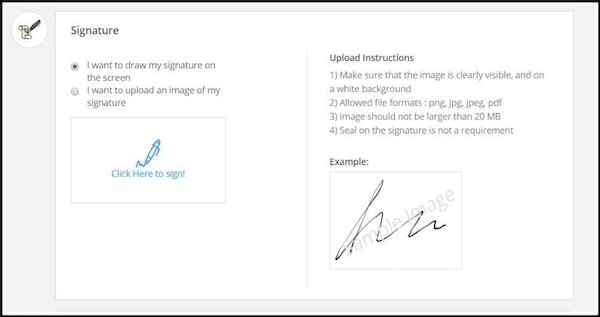
After the store details, you will see the section for Signature.
Check your Signature details and update it accordingly.
Bank Details
When you scroll down further, you can see the section to update your bank details.

If you did not submit the details at the time of registration, here you have to submit your Name and Account number. Your IFSC code will also get verified here.
Upload a canceled cheque
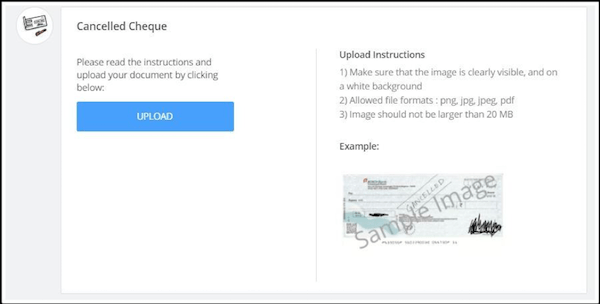
Scan a cancelled cheque or take a picture of it and click on ‘upload’ to upload the picture.
Cancelled cheque should be of bank account whose details were submitted to Flipkart in previous step.
Note:
- Image size should be less than 20 MB.
- Allowed file formats are png, jpeg, jpg and pdf.
- Image should have white background.
Upload your Address
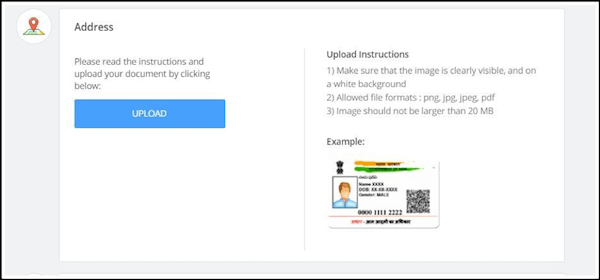
If you haven’t submitted your address at the time of registration, you have to do it here in order to complete your seller profile.
Upload the scanned image of your address proof.
- Allowed file formats for the image are: png, jpeg, jpg and pdf.
- Picture with only white background are allowed.
- Size of Image should not be more than 20 MB.
Product Listings
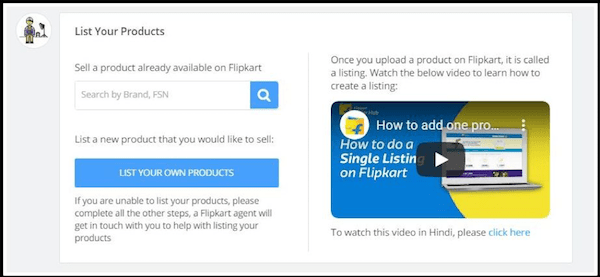
With this option, a seller can list items to sell on Flipkart.
You can either search already listed products on Flipkart to sell them or you can list your own products.
You can take the help of the video provided on the right of this section to understand the process of listing.
Note: In case you are unable to list the products, leave this step. Once you complete all other steps, a Flipkart agent will call you to help you with product listing.
Verify Your Account through Email.

If you haven’t checked your mail for the verification code, you can resend the verification code from here as well.
A verification code is valid for 24 hours only. If it expires, account verification can be completed later on as well.
With Flipkart seller’s registration, you get the authority to sell anything online. You can list your products on the marketplace and start doing your business online. The seller’s dashboard helps sellers to organize their products and get every detail about their business.
The dashboard serves as a mode of communication between sellers and Flipkart. A 24X7 support is also provided to the sellers for their queries. The seller support team solves their queries in the least possible time period. This also proves that Flipkart is also a seller centric e-commerce platform.
FAQ (Frequently Asked Questions)
GST is mandatory for eCommerce, hence you will need to eventually provide GST to complete Flipkart Seller Registration. Though, you can opt to submit it later.
However, Flipkart Seller Registration without GST is possible if you are selling products in categories that are exempt from GST like Books. For this, at the time of registration select the option “I will only sell in GSTIN exempt categories like books”.
You require the following documents to register on Flipkart:
1. GSTIN Certificate
2. PAN Card
3. Canceled cheque of the account used
Apart from this, you will require the following details:
1. Bank Account No.
2. Address and Pickup Address
Make sure your Bank Account has KYC done.
Still have doubts regarding Flipkart Seller Registration or completing details of your Flipkart Seller Account? Ask in the comments below and we will answer your concerns.